mirror of
https://github.com/open-webui/docs.git
synced 2026-01-02 17:59:41 +07:00
73 lines
3.9 KiB
Markdown
73 lines
3.9 KiB
Markdown
---
|
|
sidebar_position: 20
|
|
title: "💥 Monitoring and Debugging with Langfuse"
|
|
---
|
|
|
|
# Langfuse Integration with Open WebUI
|
|
|
|
[Langfuse](https://langfuse.com/) ([GitHub](https://github.com/langfuse/langfuse)) offers open source observability and evaluations for Open WebUI. By enabling the Langfuse integration, you can trace your application data with Langfuse to develop, monitor, and improve the use of Open WebUI, including:
|
|
|
|
- Application [traces](https://langfuse.com/docs/tracing)
|
|
- Usage patterns
|
|
- Cost data by user and model
|
|
- Replay sessions to debug issues
|
|
- [Evaluations](https://langfuse.com/docs/scores/overview)
|
|
|
|
## How to integrate Langfuse with Open WebUI
|
|
|
|
|
|
_Langfuse integration steps_
|
|
|
|
[Pipelines](https://github.com/open-webui/pipelines/) in Open WebUI is an UI-agnostic framework for OpenAI API plugins. It enables the injection of plugins that intercept, process, and forward user prompts to the final LLM, allowing for enhanced control and customization of prompt handling.
|
|
|
|
To trace your application data with Langfuse, you can use the [Langfuse pipeline](https://github.com/open-webui/pipelines/blob/d4fca4c37c4b8603be7797245e749e9086f35130/examples/filters/langfuse_filter_pipeline.py), which enables real-time monitoring and analysis of message interactions.
|
|
|
|
## Quick Start Guide
|
|
|
|
### Step 1: Setup Open WebUI
|
|
|
|
Make sure to have Open WebUI running. To do so, have a look at the [Open WebUI documentation](https://docs.openwebui.com/).
|
|
|
|
### Step 2: Set Up Pipelines
|
|
|
|
Launch [Pipelines](https://github.com/open-webui/pipelines/) by using Docker. Use the following command to start Pipelines:
|
|
|
|
```bash
|
|
docker run -p 9099:9099 --add-host=host.docker.internal:host-gateway -v pipelines:/app/pipelines --name pipelines --restart always ghcr.io/open-webui/pipelines:main
|
|
```
|
|
|
|
### Step 3: Connecting Open WebUI with Pipelines
|
|
|
|
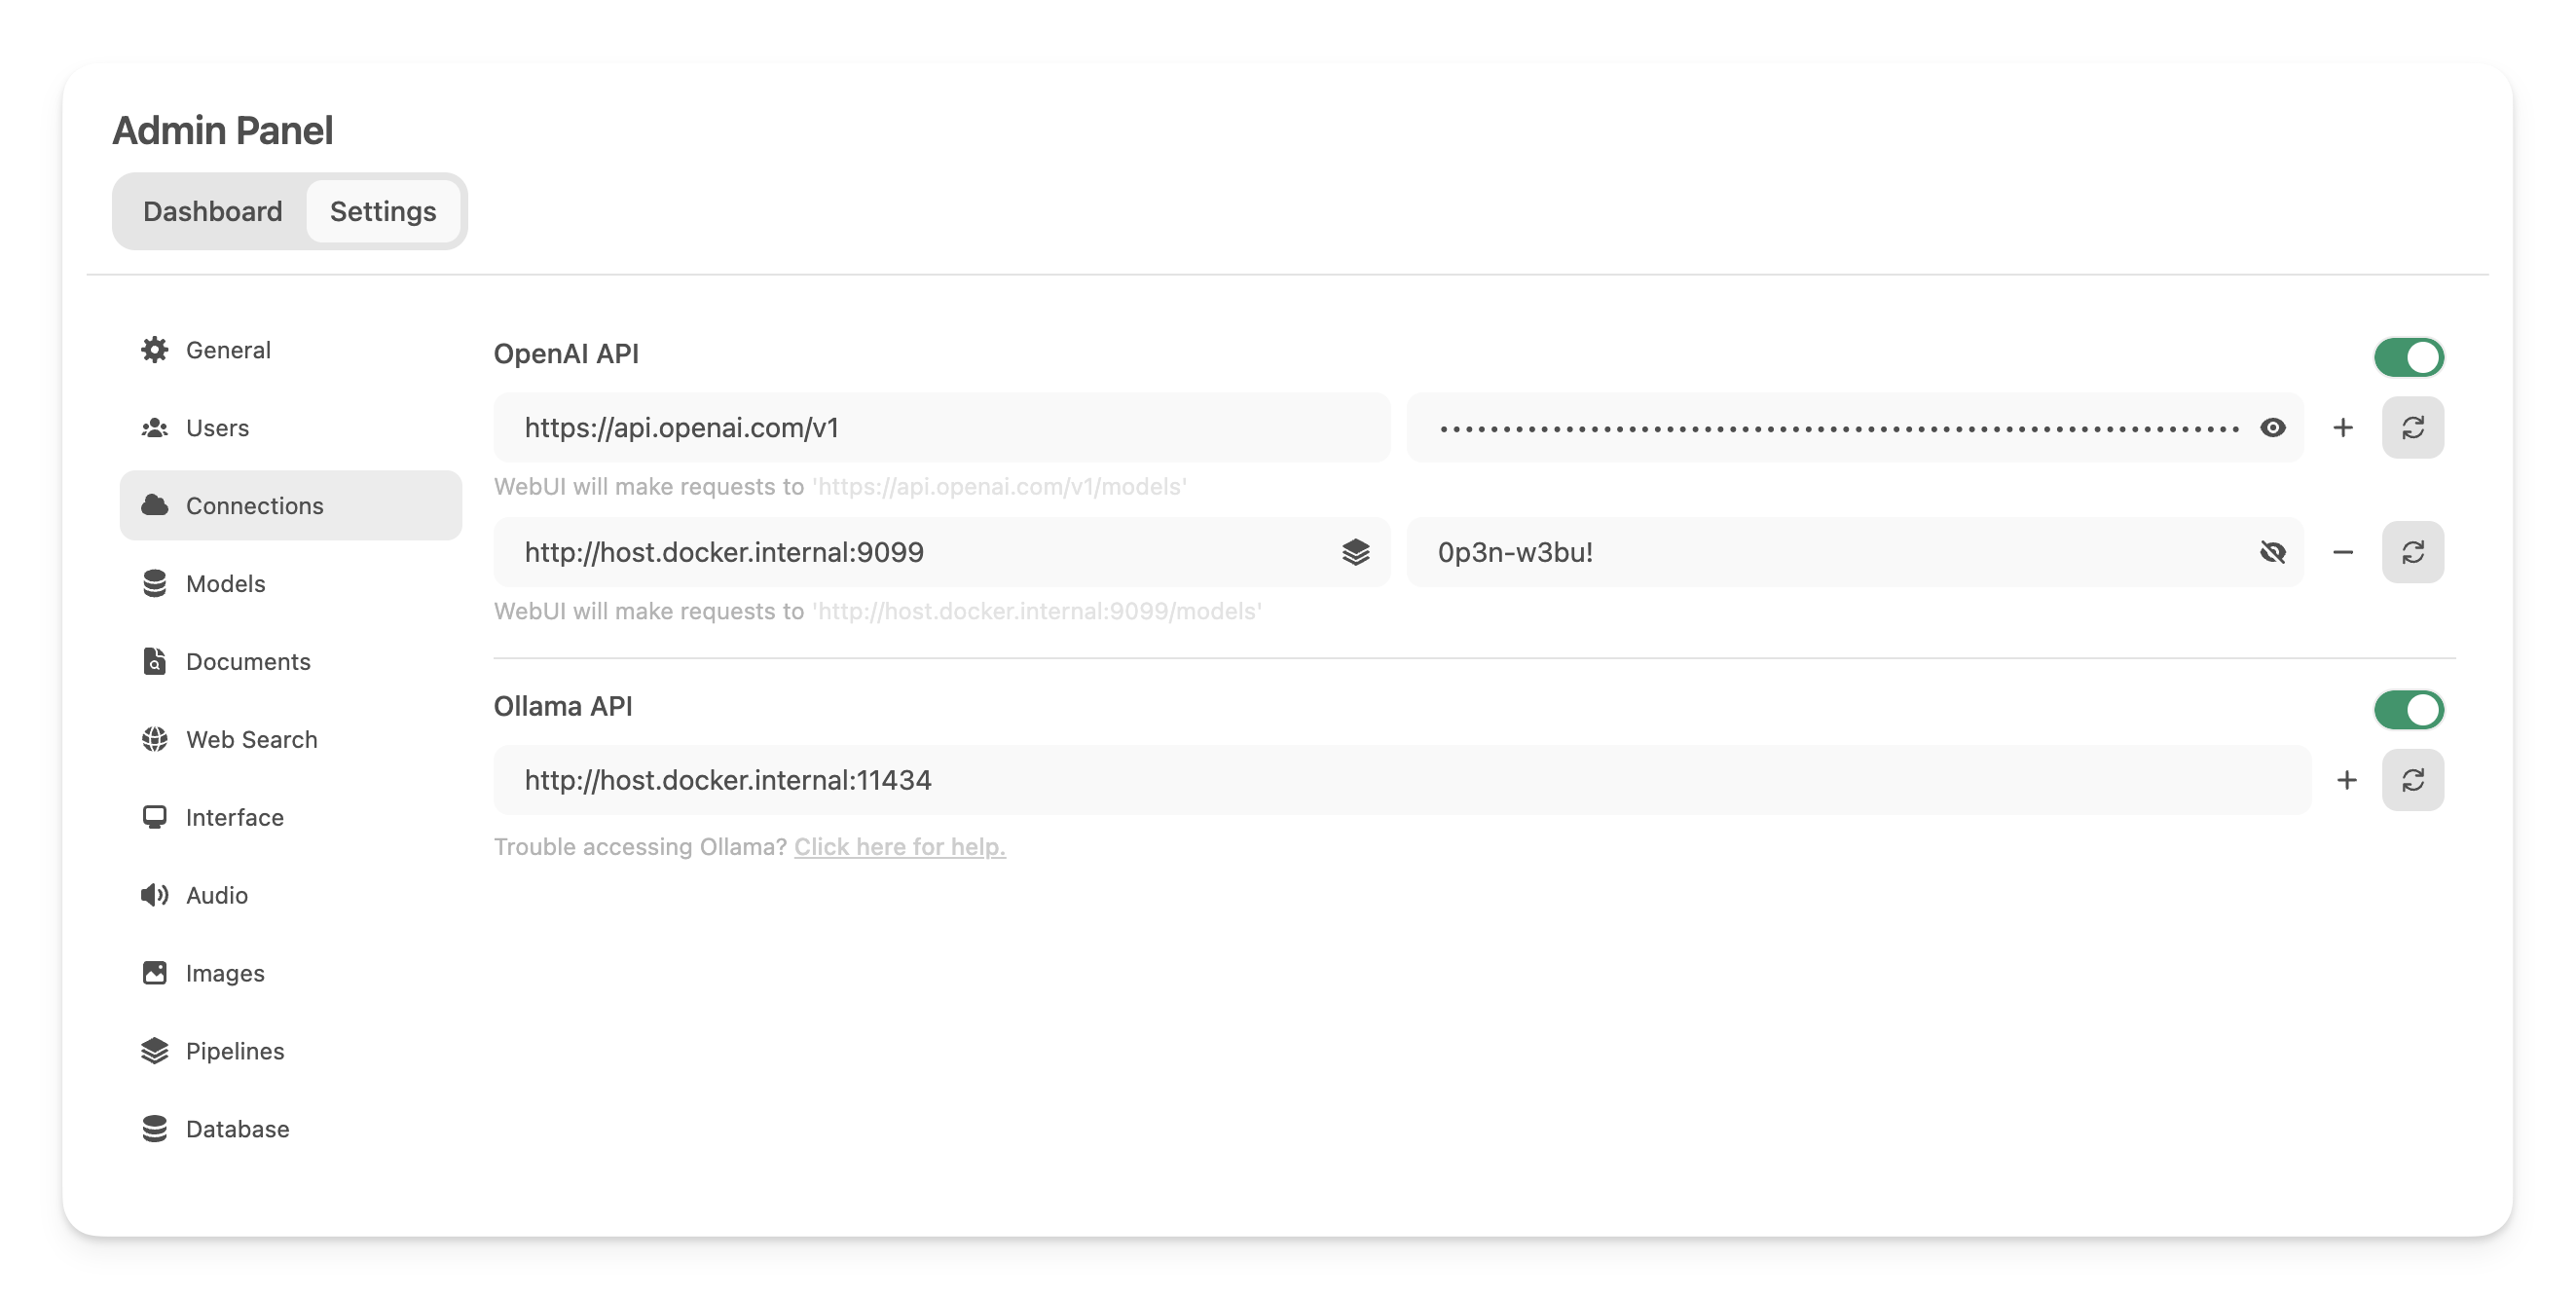
In the _Admin Settings_, create and save a new connection of type OpenAI API with the following details:
|
|
|
|
- **URL:** http://host.docker.internal:9099 (this is where the previously launched Docker container is running).
|
|
- **Password:** 0p3n-w3bu! (standard password)
|
|
|
|
|
|
|
|
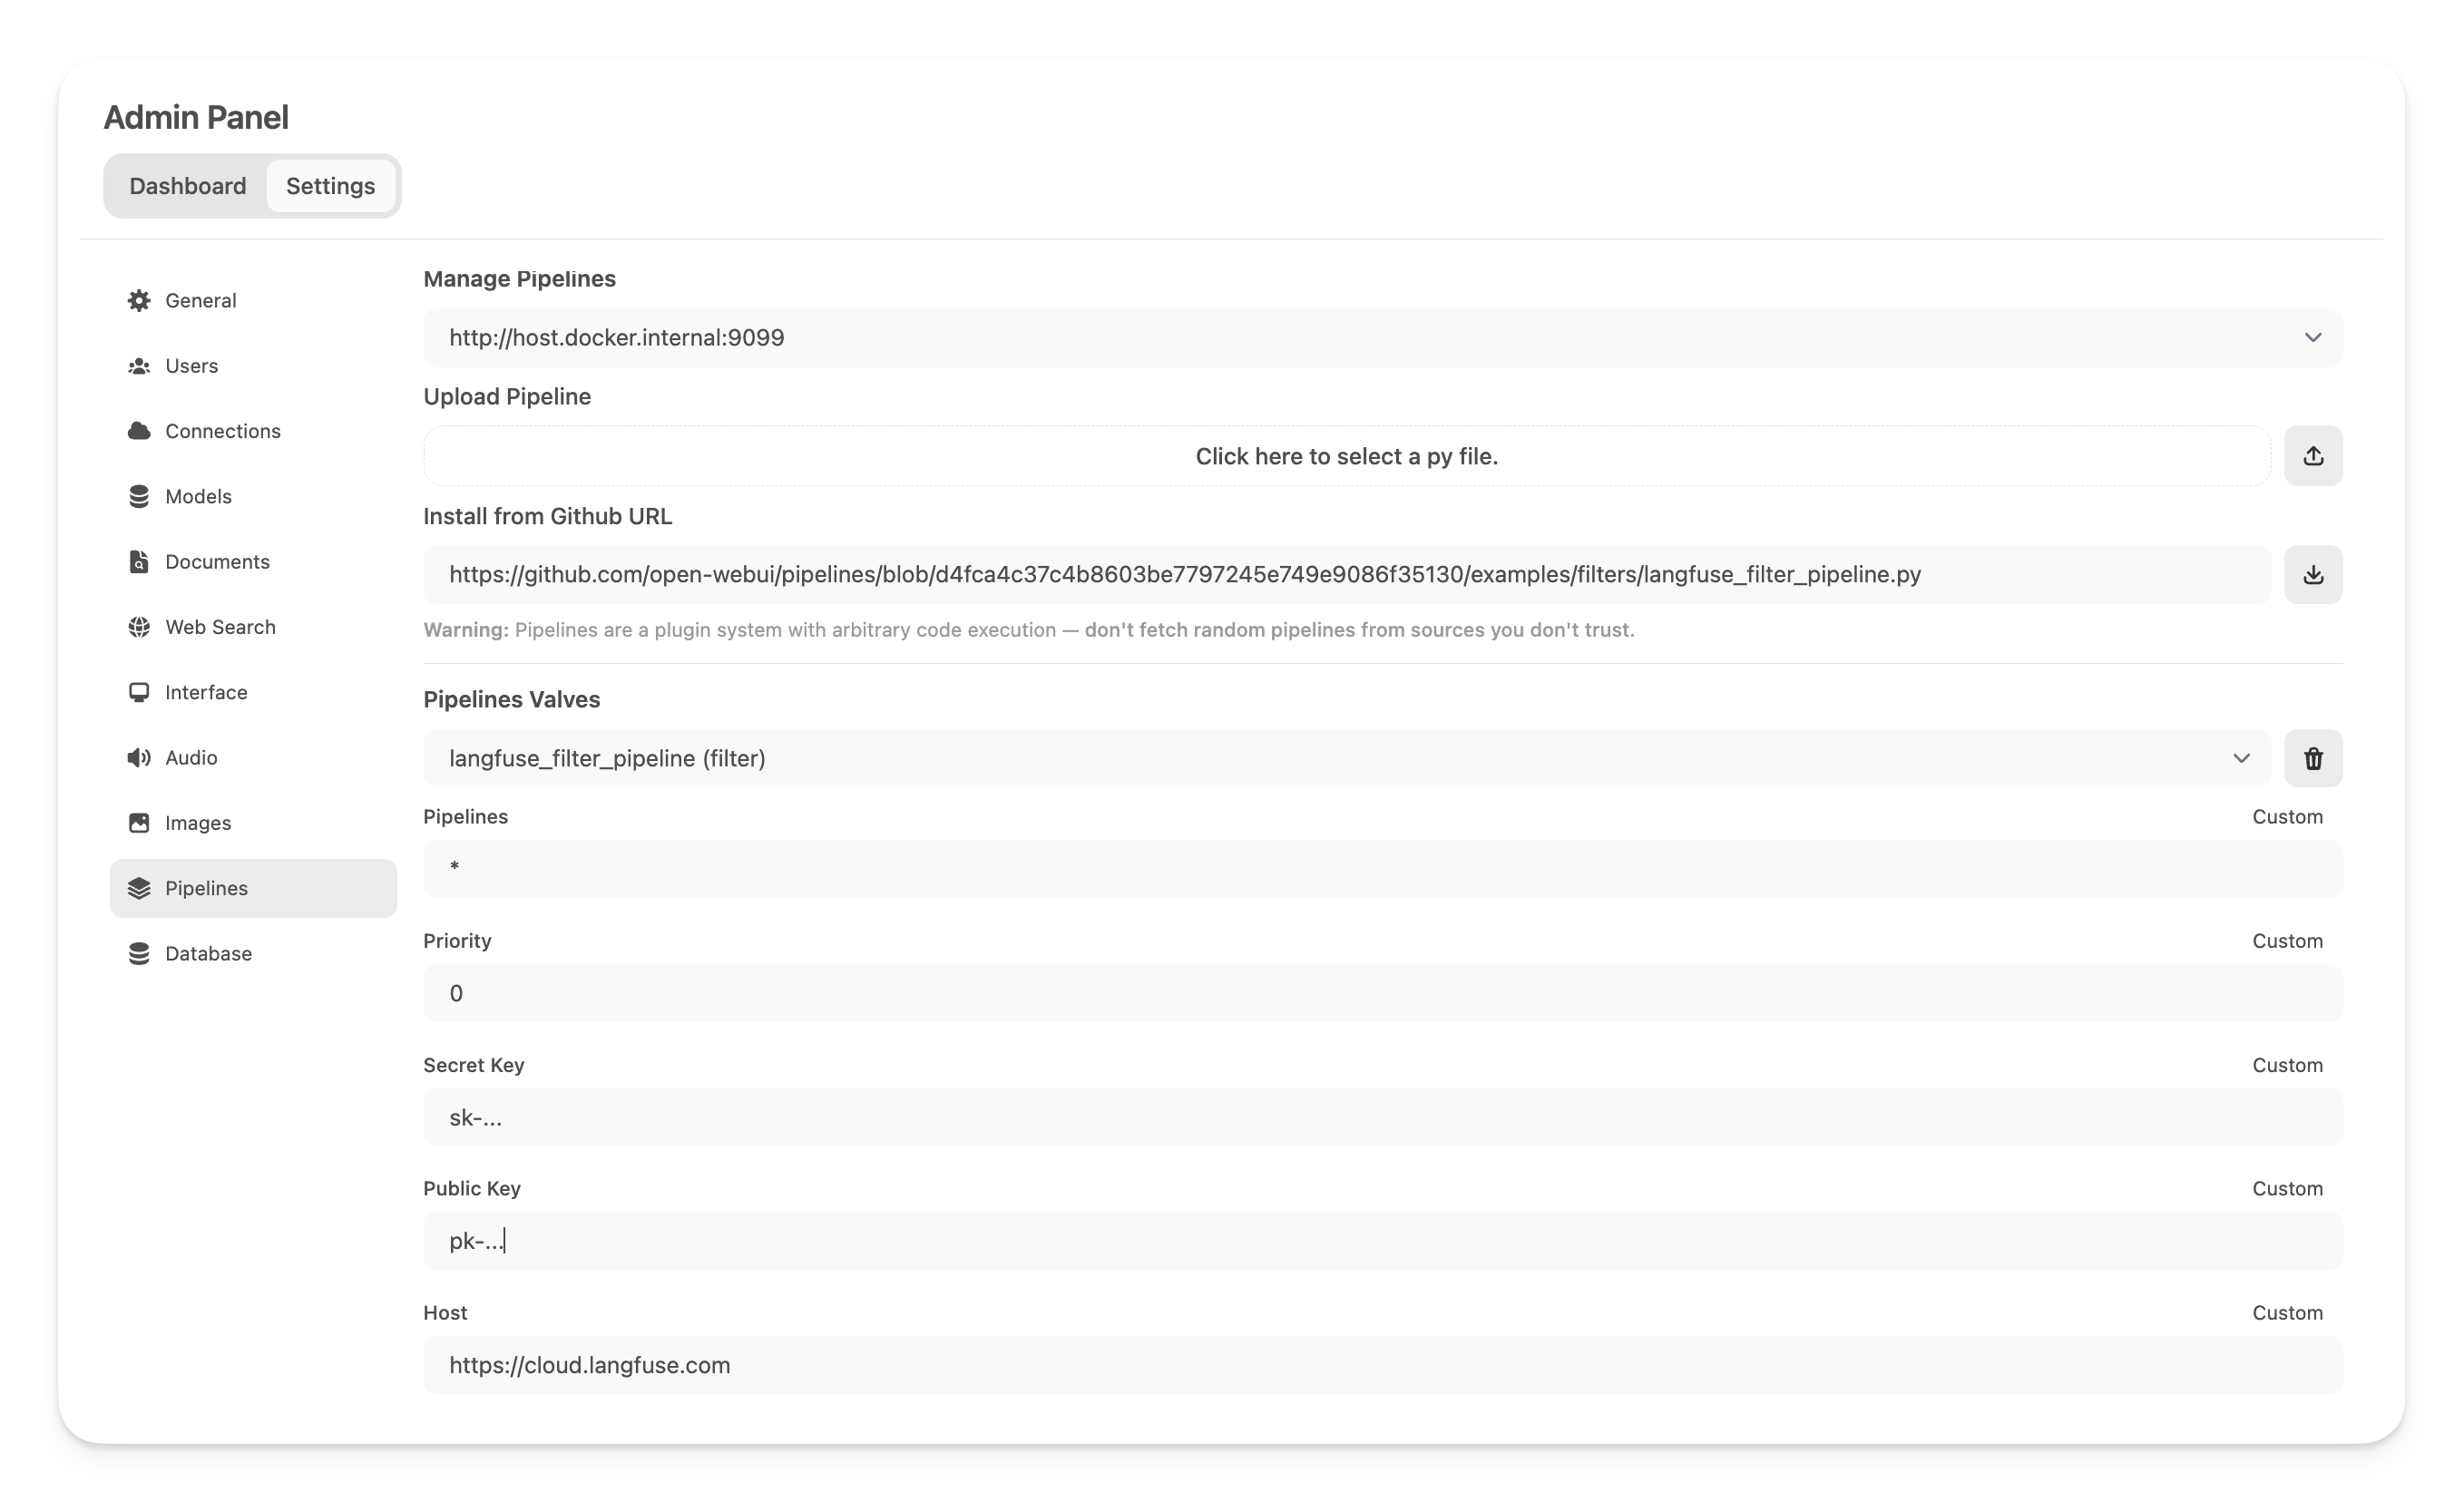
### Step 4: Adding the Langfuse Filter Pipeline
|
|
|
|
Next, navigate to _Admin Settings_ -> _Pipelines_ and add the Langfuse Filter Pipeline. Specify that Pipelines is listening on http://host.docker.internal:9099 (as configured earlier) and install the [Langfuse Filter Pipeline](https://github.com/open-webui/pipelines/blob/main/examples/filters/langfuse_filter_pipeline.py) by using the _Install from Github URL_ option with the following URL:
|
|
|
|
```
|
|
https://github.com/open-webui/pipelines/blob/main/examples/filters/langfuse_filter_pipeline.py
|
|
```
|
|
|
|
Now, add your Langfuse API keys below. If you haven't signed up to Langfuse yet, you can get your API keys by creating an account [here](https://cloud.langfuse.com).
|
|
|
|
|
|
|
|
_**Note:** Capture usage (token counts) for OpenAi models while streaming is enabled, you have to navigate to the model settings in Open WebUI and check the "Usage" [box](https://github.com/open-webui/open-webui/discussions/5770#discussioncomment-10778586) below _Capabilities_._
|
|
|
|
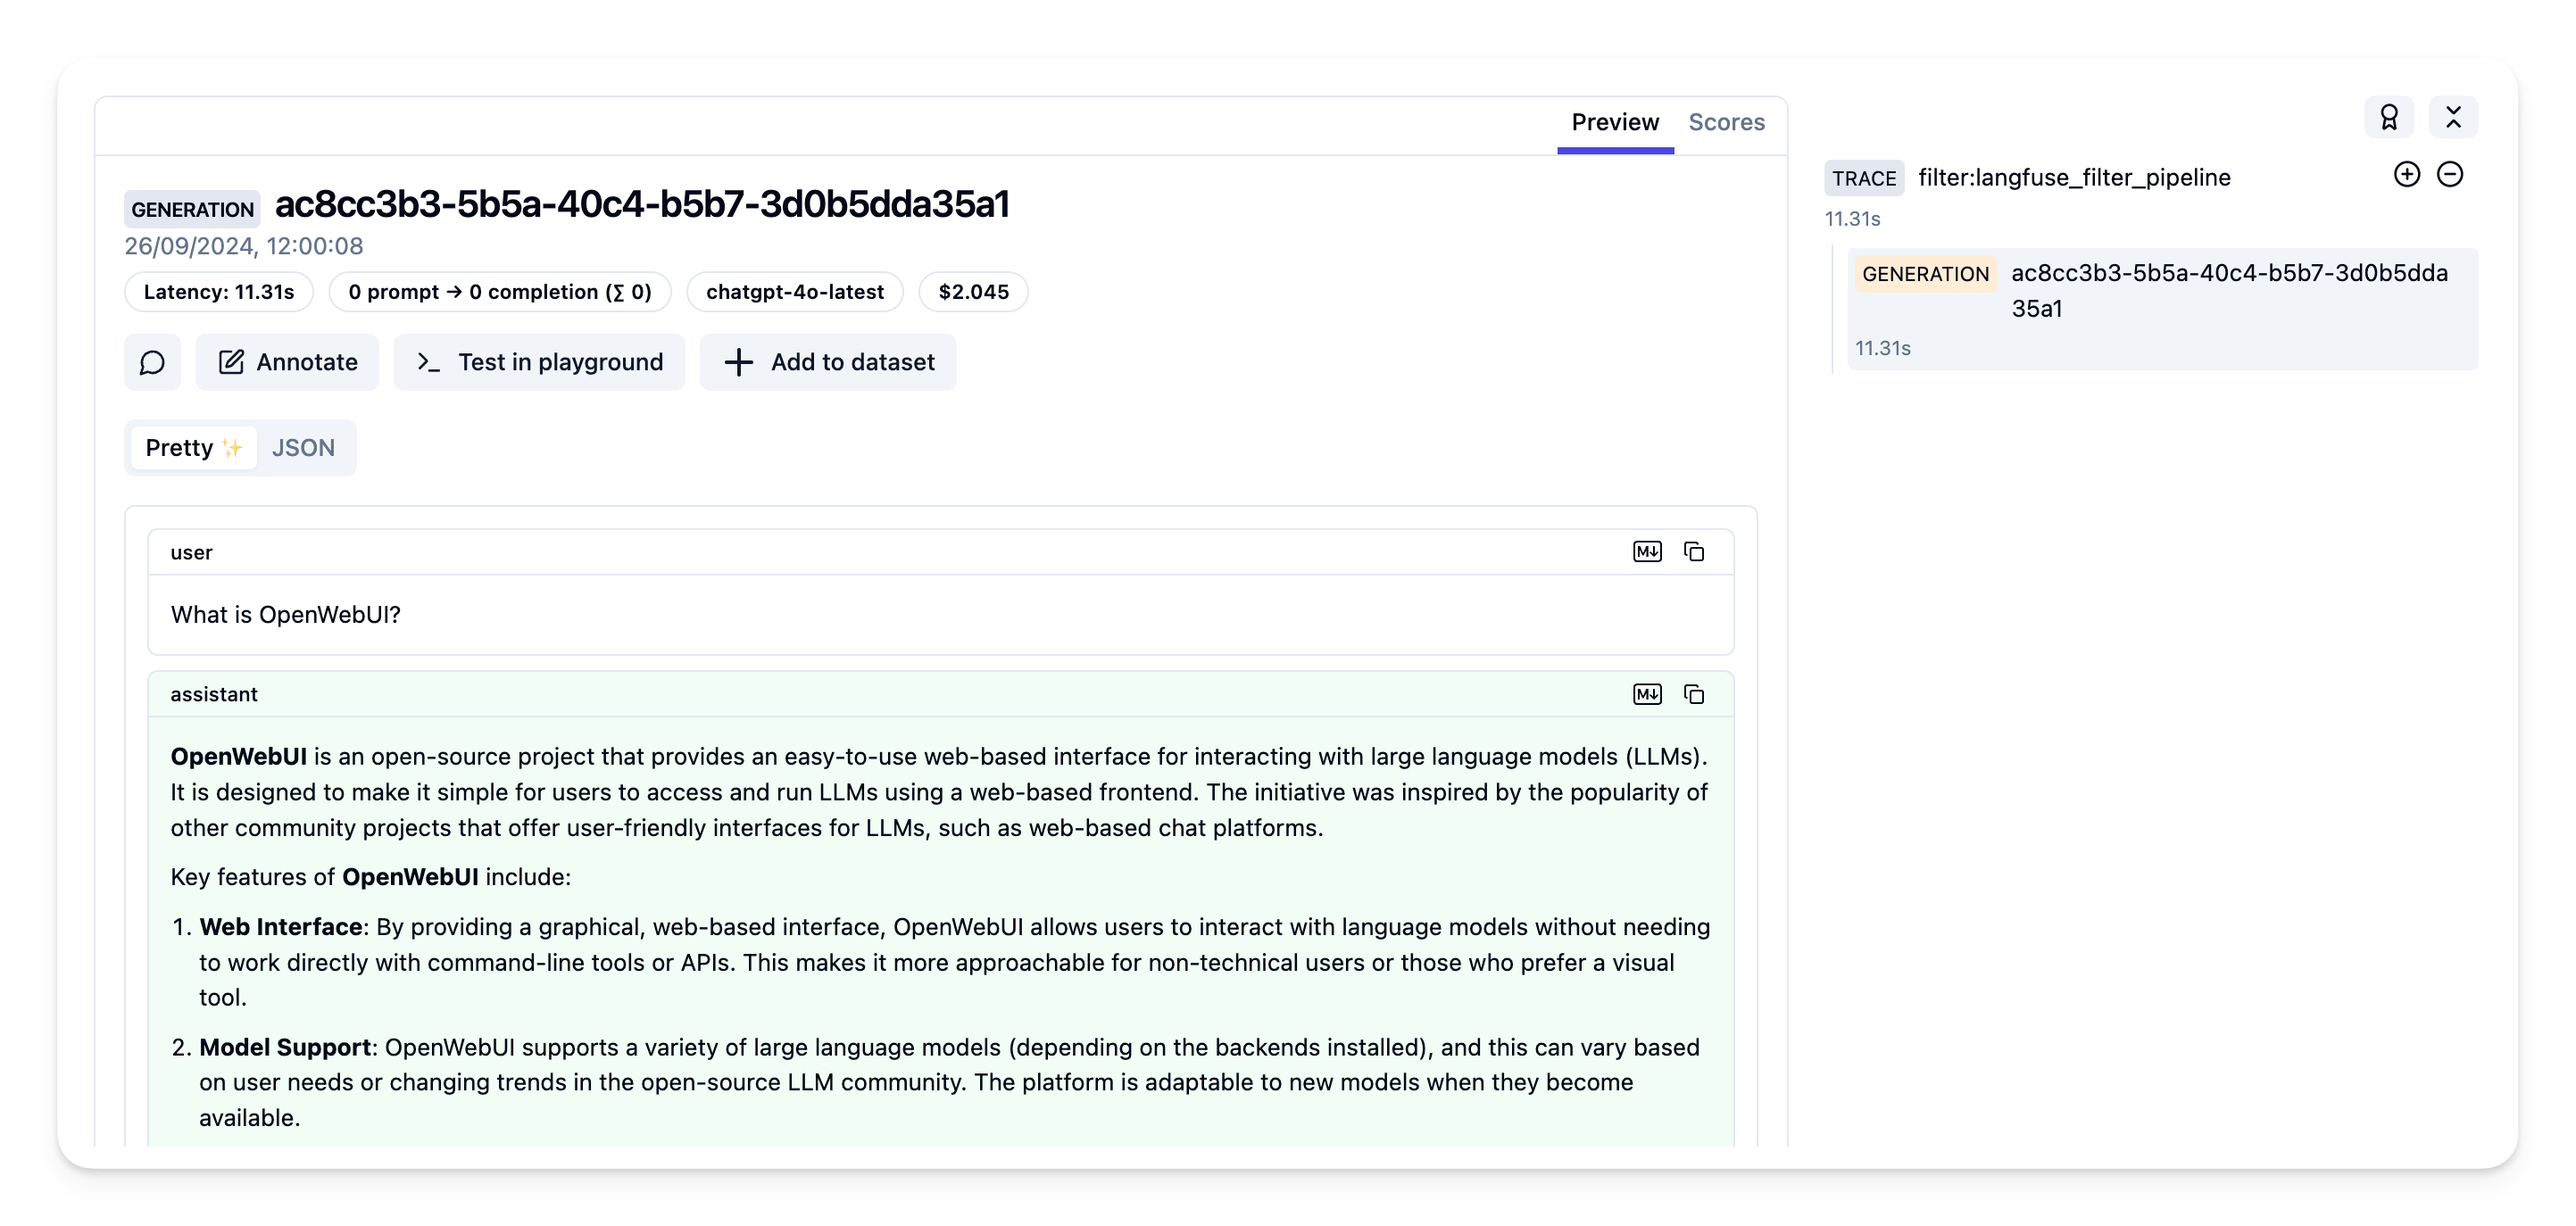
### Step 5: See your traces in Langfuse
|
|
|
|
You can now interact with your Open WebUI application and see the traces in Langfuse.
|
|
|
|
[Example trace](https://cloud.langfuse.com/project/cloramnkj0002jz088vzn1ja4/traces/904a8c1f-4974-4f8f-8a2f-129ae78d99c5?observation=fe5b127b-e71c-45ab-8ee5-439d4c0edc28) in the Langfuse UI:
|
|
|
|
|
|
|
|
## Learn more
|
|
|
|
For a comprehensive guide on Open WebUI Pipelines, visit [this post](https://ikasten.io/2024/06/03/getting-started-with-openwebui-pipelines/).
|